


Add your email address to Apple Mail
Definitions
Adding your email address to Apple Mail allows you to manage your emails directly from the Apple Mail app on your Mac computer or iOS devices. Apple Mail is only available on Mac computers and iOS devices.
Before you start
✅ Make sure the Apple Mail app is installed on your device before starting.
🚨 IMPORTANT: For all devices, you will require both your IMAP and SMTP settings, note them down before going to your device specific step by step instructions further below.
IMAP settings
- Incoming Mail Server: mail.yourdomain.com
⚠️ Note: Replace yourdomain.com with your domain name
- Username: Your full email address
- Password: Your email address password
- Port: 993
- Use SSL/TLS to connect: Enabled
SMTP settings
- Outgoing Mail Server: mail.yourdomain.com
⚠️ Note: Replace yourdomain.com with your domain name
- Username: Your full email address
- Password: Your email address password
- Port: 587
- Use SSL/TLS to connect: Enabled
ℹ️ Note: If port 587 does not connect, use 465 as the SMTP port
Step by step
Mac computer
To connect your email to Apple Mail on your Mac, follow Method A or B below. If one method doesn’t work, try the other. Names and specifics may vary by device and software version.
Method A
1. Open Apple Mail
2. If it’s your first time using the Mail app, it will prompt you to add an account. If not, go to Mail > Add Account from the menu bar.
3. Select Other Mail Account and click Continue
4. Enter your full name, email address, and email password. Click Sign In.
5. If Apple Mail can’t find your email settings, you’ll need to enter them manually. Choose IMAP as the account type.
6. Fill in the incoming mail details, these are your IMAP settings
7. Fill in the outgoing mail details, these are your SMTP settings
8. Click Sign In
9. Choose the tools you want to enable (Mail, Contacts, Calendars, etc.) and click Done
Method B
1. Log in to your hosting control panel
2. From the top right, click the down arrow ∨ and choose the domain your email address is under

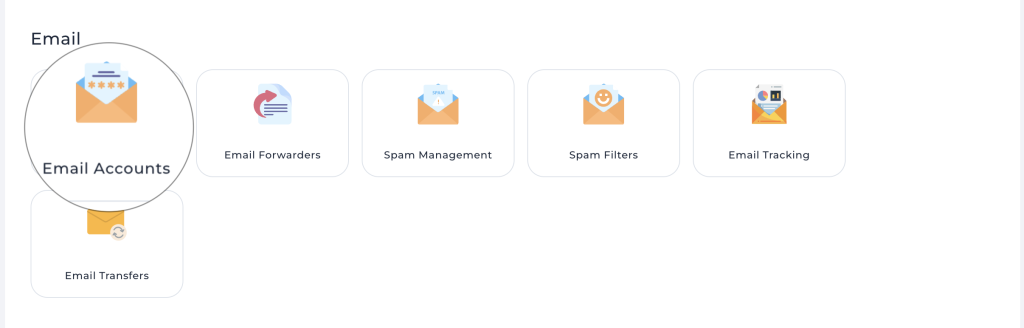
3. Click on the Email Accounts button
4. Find your email address

5. Click on the plus + sign to the right of your email address

6. From the popup, select Download Apple iOS, iPadOS, Mac Configuration

7. Download the file to your Mac computer
8. Once downloaded, click your Finder button

9. In your Finder, find and click on your Systems Settings application

10. In your Systems Settings, search for Profiles and click on it

11. Find your email address profile, and double click on it

12. On the popup, click Install and follow the prompts. Once the installation is complete, the email account will be on your Apple Mail app.

iPhone
To connect your email to Apple Mail on your iPhone, follow Method A or B below. If one method doesn’t work, try the other. Names and specifics may vary by device and software version.
Method A
1. Open the Settings app on your iPhone
2. Scroll down and tap Mail, then select Accounts
3. Tap Add Account, choose Other, and tap Add Mail Account
4. Enter your name, email address, email password, and a description for the account, then tap Next
5. Make sure IMAP is selected
6. Fill in the incoming mail details, these are your IMAP settings
7. Fill in the outgoing mail details, these are your SMTP settings
8. Tap Next; if all the information is correct, your iPhone will verify the account
9. Choose the tools you want to enable (Mail, Contacts, Calendars, etc.) and tap Save
Method B
⚠️ Note: If you’re using this method, complete steps 1-8 on your Mac computer, not iPhone.
1. Log in to your hosting control panel
2. From the top right, click the down arrow ∨ and choose the domain your email address is under
3. Click on Email Accounts
4. Find your email address
5. Click on the plus + sign to the right of your email address
6. From the popup, select Download Apple iOS, iPadOS, Mac Configuration
7. Download the file to your Mac computer
8. Once downloaded, use AirDrop via Bluetooth to send the file from your Mac computer to your iPhone
9. Once sent to your iPhone, open your iPhone Settings app

10. In your Settings app, go to Profile Downloaded and click on it

11. On the popup, click Install and follow the prompts. Once the installation is complete, the email account will be on your Apple Mail app.

iPad
To connect your email to Apple Mail on your iPad, follow Method A or B below. If one method doesn’t work, try the other. Names and specifics may vary by device and software version.
Method A
1. On your iPad, open the Settings app
2. Scroll down and tap on Mail, then choose Accounts
3. Tap on Add Account, then select Other, followed by Add Mail Account
4. Enter your name, email address, email password, and a description for the account, and then tap Next
5. Make sure IMAP is selected
6. Fill in the incoming mail details, these are your IMAP settings
7. Fill in the outgoing mail details, these are your SMTP settings
8. Tap Next; if your details are correct, the Mail app will verify your account and complete the setup
9. Tap Save when finished
Method B
⚠️ Note: If you’re using this method, complete steps 1-8 on your Mac computer, not iPad.
1. Log in to your hosting control panel
2. From the top right, click the down arrow ∨ and choose the domain your email address is under
3. Click on the Email Accounts button
4. Find your email address
5. Click on the plus + sign to the right of your email address
6. From the popup, select Download Apple iOS, iPadOS, Mac Configuration
7. Download the file to your Mac computer
8. Once downloaded, use AirDrop via Bluetooth to send the file from your Mac computer to your iPad
9. Once sent to your iPad, open your iPad Settings app
10. In your Settings app, go to Profile Downloaded and click on it
11. On the popup, click Install and follow the prompts. Once the installation is complete, the email account will be on your Apple Mail app.